

How to Fit an Outside Tap: A Step-by-Step UK Guide
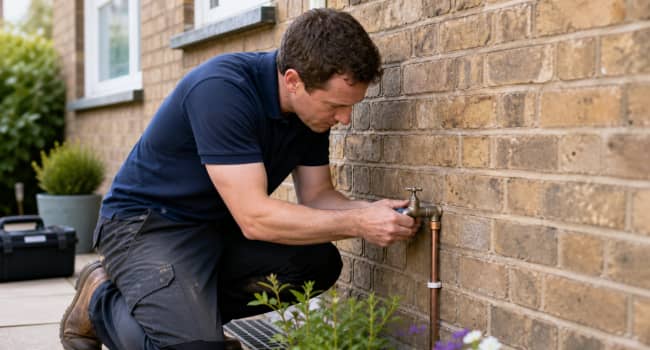
You’re standing in the kitchen, feeding a hose through the back door because there’s no water point in the garden. Or you’ve got an old outside tap that’s rusted, seized or dripping all summer. Either way, you’re probably wondering how to fit an outside tap without making a mess of your wall or your plumbing.
It’s a fair worry. You have to drill through brickwork and connect to the mains, and a poor connection at the wall can cause problems inside your house.
This guide covers what you need, where to take the supply from, the steps in order, how to protect the tap from frost, what it costs and when to hand the job to a plumber.
TL;DR
- Fitting an outside tap typically takes 1–3 hours and suits confident DIYers.
- Take the supply from the mains rising main, usually under the kitchen sink, never from the cold water storage tank or a hot pipe.
- A double check valve is required by the Water Regulations to stop backflow into the drinking water.
- Fit an isolation valve with a drain-off point inside the property so the outside pipe can be drained before frost.
- Drill through the wall with a masonry bit angled slightly downward and outward, and slope the pipe slightly downward toward the tap.
- Tenants and leaseholders should get permission before drilling into an outside wall.
- Call a plumber if the pipework is awkward, the rising main is hard to reach or you are unsure about backflow protection.
Table of Contents
- How Do You Fit an Outside Tap?
- What Do You Need to Fit an Outside Tap?
- Where Should the Water Supply for an Outside Tap Come From?
- Why Does an Outside Tap Need a Double Check Valve?
- How Do You Fit a Hose to an Outside Tap?
- How Long Does It Take and How Much Does It Cost?
- How Do You Protect an Outside Tap From Freezing?
- What Can Go Wrong When Fitting an Outside Tap?
- Can You Fit an Outside Tap in a Rented Home or Caravan?
- When Should You Call a Plumber?
- Frequently Asked Questions
How Do You Fit an Outside Tap?
To fit an outside tap, turn off the water, branch off the mains pipe with an isolation valve and a spur pipe, drill through the wall, fit the tap on a backplate with a double check valve, then test every joint for leaks. The whole job typically takes 1–3 hours.
Fitting an outside tap suits you if you’re confident cutting into a pipe, using compression or push-fit fittings and drilling through brick. It’s a small job, but it connects straight to your drinking water supply, so the connection has to be right. A double check valve is a pair of one-way valves that stop water flowing backwards, and the stopcock is the main shut-off valve for your home’s water.
How to fit an outside tap by taking a supply from the mains pipe, running it through an external wall and fitting a tap with a double check valve.
Turn off the water and drain the pipe
Turn off the stopcock and open the kitchen cold tap to drain the pipe. This stops water coming out when you cut into the mains pipe.
Choose the pipe route
Pick the shortest path from the rising main to an external wall. Aim for the tap to sit about 400–600mm above ground, clear of the damp-proof course.
Fit the isolation valve with drain-off
Fit an isolation valve with a drain-off point on the branch from the mains pipe, using a compression or push-fit tee. This lets you shut off and drain the outside run in winter.
Run the pipe to the wall
Run 15mm copper or plastic pipe from the valve to the external wall. Give it a slight fall toward the outside so it drains fully.
Drill through the wall
Drill through the wall with a masonry bit, angled slightly downward and outward so rain can’t run back in. Check first that no cables or pipes run behind the spot.
Fit the backplate and connect the pipe
Fit the backplate (wall plate elbow) on the outside wall. Pass the pipe through the hole and connect it to the backplate.
Fit the tap and double check valve
Wrap the threads with PTFE tape and fit the tap to the backplate with a double check valve. Use a tap with the valve built in, or fit a separate one.
Turn the water on and test
Open the stopcock and check every joint for drips. Then open the isolation valve and run the outside tap until the water flows clear.
Seal the hole and lag the pipe
Seal around the pipe on the outside wall with a suitable exterior sealant. Fit pipe lagging on any run in a cold space to protect it from frost.
Pro Tip: Dry-fit everything before you drill. Lay the pipe, valve and backplate in position, mark the wall, and use a cable and pipe detector to check nothing runs behind the spot you’ve picked.
What Do You Need to Fit an Outside Tap?
You need an outside tap kit (tap, backplate and double check valve), a drill with a masonry bit, adjustable spanners, PTFE tape, 15mm pipe, an isolation valve with drain-off and pipe fixings. The isolation valve is easy to forget, but it’s what lets you drain the tap for winter.
- Outside tap kit with tap, backplate (wall plate elbow) and double check valve
- Isolation valve with a drain-off point
- 15mm copper or plastic pipe, plus a tee to branch off the mains pipe
- Compression or push-fit fittings to suit your pipe
- Drill and a masonry bit long enough to go through the wall
- Adjustable spanners and a pipe cutter
- PTFE tape, pipe clips and exterior sealant
- Pipe lagging for any run in a cold space
- Cable and pipe detector, bucket and towels
A kit is the simplest route because the parts are matched and the double check valve is included. Buying parts separately costs more time than money, and you have to make sure the valve and tap threads match.
Where Should the Water Supply for an Outside Tap Come From?
The supply for an outside tap should come from the mains-fed rising main, usually under the kitchen sink, taken before any water softener or filter. The rising main is the pipe that brings mains water into your home. Never take the supply from pipes fed by the cold water storage tank in the loft, or from a hot pipe.
| Acceptable | Not acceptable |
| The rising main under the kitchen sink, before any filter or softener | Pipes fed by the cold water storage tank in the loft, or any hot water pipe |
Tank water is stored, so it isn’t fresh mains water, and its pressure is too low for a hose. A hot pipe would waste heated water on the garden. If you have a softener, branch off before it, or you’ll be using up softened water on the lawn.
Pick the cold mains pipe with the easiest path to an outside wall. Most branches use 15mm pipe, and you’ll need a tee that matches what’s already there. If the pipework is lead or very old, don’t cut into it yourself. Our guide to plumbing problems in old houses explains why older pipes need a more careful approach.
Why Does an Outside Tap Need a Double Check Valve?
An outside tap needs a double check valve because the Water Regulations require backflow protection. The valve stops hose water, fertiliser, pet mess or chemicals being sucked back into your drinking water supply if the mains pressure drops.
Here’s how it happens. If a nearby main bursts or the water company is working on the network, pressure can fall and the flow can reverse. A hose with its end sitting in a bucket, pond or paddling pool can then siphon that water back into the pipework. A double check valve has two one-way valves in a row, so water can only travel outward.
This is a legal requirement, not an upgrade. Buy a tap with the valve built in, or fit a separate double check valve on the pipe before the tap. Either way, don’t leave a hose lying submerged in a pond, bucket or pool.
How Do You Fit a Hose to an Outside Tap?
To fit a hose to an outside tap, screw or clip a hose connector onto the tap’s threaded outlet, which is commonly 1/2 inch BSP, and tighten it by hand. If the outlet isn’t threaded, use a tap adapter that grips the spout.
- Check the tap outlet. A threaded outlet takes a screw-on connector directly. A plain spout needs a universal tap adapter.
- Fit the hose connector, with its rubber washer inside, and tighten it by hand until it’s snug.
- Clip the hose onto the connector, open the tap slowly and check for drips at the join.
If the join leaks, the washer is usually worn or missing, so swap it before tightening further. Take the hose off in winter so water can’t sit in the tap and freeze.
How Long Does It Take and How Much Does It Cost?
Fitting an outside tap takes roughly 1–3 hours for a competent DIYer, depending on how easy the pipe is to reach. The kit itself is inexpensive. A plumber’s price depends on access, pipe route, wall type and call-out charges.
If you’re weighing DIY against hiring someone, a tap repair and replacement service in London covers supply connections, leak repair and the fitting or replacing of taps, so you know what’s on offer.
| What affects the price | Why it matters |
| Access to the rising main | A boxed-in or cramped pipe takes longer to reach |
| Pipe route length | A longer run means more pipe, clips and time |
| Wall type | Solid brick, stone or thick walls take longer to drill |
| Pipe material | Old or lead pipework needs extra care and different fittings |
| Call-out and labour charges | Vary between plumbers and by area |
How Do You Protect an Outside Tap From Freezing?
To protect an outside tap from freezing, close the internal isolation valve before the first frost, open the outside tap to drain the pipe, and leave it open. Take any hose off at the same time so no water is trapped.
This matters more than most people think. When water freezes in an outside tap, the ice expands and can split the pipe. Often the split is on the warm side of the wall, so you won’t see it until the thaw, when water pours out inside the kitchen. Frozen outside taps are a common cause of burst pipes in kitchens.
- Close the isolation valve inside before temperatures are forecast to reach 0°C.
- Open the outside tap and the drain-off point to let the pipe empty, then leave the tap open.
- Disconnect the hose and drain it.
- Fit an insulating tap cover if you want extra protection.
- Lag any pipe in a cold space such as a garage, cupboard or outbuilding.
Pro Tip: A slight downward slope on the outside run helps the pipe drain fully. Water that can’t run out sits in the low point and freezes.
For more ways to guard your home against the cold, see our tips to keep your home warm this winter. If you’re going away in winter, close the isolation valve before you leave, and read whether to turn your boiler off on holiday too.
What Can Go Wrong When Fitting an Outside Tap?
Most problems come from rushed connections or a badly angled hole. These are the common ones and how to fix them:
- Leaking joints: Drain the pipe, remake the joint with fresh PTFE tape or check the olive (the small brass ring inside a compression joint) is seated properly, then retest.
- Hole angled upward: Rain runs back into the wall. Redrill with a slight downward and outward angle, and seal the old hole.
- Tap too close to the damp-proof course: Water splashing there can cause damp. Keep the tap 400–600mm above ground.
- Wrong supply source: If you tapped into a pipe fed by the storage tank or a hot pipe, move the branch to the cold mains.
- Cables or pipes behind the wall: Always scan first. Our guide on how to drill into a wall covers safe drilling.
- Dripping tap after fitting: A drip from the spout is usually a worn washer or cartridge. See how to fix a dripping tap.
Can You Fit an Outside Tap in a Rented Home or Caravan?
If you rent or own a leasehold property, get your landlord’s or freeholder’s permission before drilling. Drilling through an outside wall and changing the plumbing usually counts as an alteration under your agreement.
A static caravan is different. It connects through a mains inlet with a flexible hose and often a pressure regulator, so a house-style outside tap kit doesn’t apply directly. Check your site rules and the caravan’s manual, and ask the site owner or a plumber familiar with caravans before you buy parts.
When Should You Call a Plumber?
Call a plumber if the job is beyond a straightforward DIY connection. Hand it over when:
- The rising main is hard to reach or boxed in.
- The pipework is lead or very old.
- The wall is solid, thick, stone or listed.
- You’re unsure about backflow protection or which pipe is the mains.
- You’re not confident with compression fittings.
Not sure who to hire? Our tips on how to find a good plumber help you pick someone reliable. No gas work is involved in this job, but if your route passes near a boiler or flue, don’t touch the gas pipework or flue. That work must be done by a Gas Safe registered engineer. If you smell gas, leave the property, don’t use switches or flames, and call 0800 111 999.
Frequently Asked Questions
Can I fit an outside tap if I have a combi boiler?
Yes. A combi boiler doesn’t change how you fit an outside tap, because the tap takes cold mains water from the rising main. No gas work is involved. Keep clear of any gas pipework or flue components when routing the pipe, and leave anything near the boiler to a Gas Safe registered engineer.
Can I replace an outside tap using the existing backplate?
Often yes. To replace an outside tap, turn off the supply, unscrew the old tap and check the thread size on the backplate matches the new one. Fit the new tap with PTFE tape and make sure it has a double check valve, either built in or fitted separately. Retest for leaks.
Can I fit an outside tap if I have a tank-fed system?
Yes, if you can reach a mains-fed cold pipe. In many tank-fed homes the kitchen cold tap is the only mains-fed outlet, so the rising main under the sink is where you branch off. Never branch from pipes fed by the storage tank, such as bathroom cold supplies. If you can’t tell which pipe is the mains, ask a plumber to identify it before you cut anything.
Do I need to tell my water company or insurer?
A tap for a hand-held hose doesn’t normally need you to notify your water company, as long as it has a double check valve. A fixed or automatic watering system does need notifying under the Water Regulations. If you’re unsure, ask your water supplier. Check your home insurance policy wording if you want to know whether plumbing changes need to be declared.
Can I attach a pressure washer or sprinkler to the new tap?
Yes, with the right adapter. Both connect to the tap’s threaded outlet using a hose connector. Keep the double check valve in place so water can’t flow back. Check your pressure washer’s manual for its minimum flow rate, as a small branch pipe may not supply enough.
Conclusion
Fitting an outside tap is a manageable job if you take the supply from the mains, fit a double check valve and add an isolation valve so you can drain the tap for winter. Get those three right, drill with a slight downward angle and test every joint, and you’ll have a reliable garden water point.
If access is tight, the pipework is old or you’re unsure about the backflow rules, hand the job to a qualified plumber. That protects both your drinking water and your kitchen wall.
How to Fit an Outside Tap: A Step-by-Step UK Guide
Need help? Hire the London Property Service experts today by giving us a call on 020 3078 5920.